Category Archives: Recipes

Artisan Bread In One Shower A Week

I used to make bread back when I had one angel child and ate a lot more carbs.

Now I have three angels, one of whom is itchy a lot and wakes up at night for no apparent reason.  I spring out of bed and flit over to hers in the dark with one blurry eye propped open, always avoiding tripping over the bear head on the floor in front of the playpen, cause sometimes looks trump practicality and it LOOKS cool to have a bear rug under the baby’s bed.

I have to get there before she actually makes a noise, cause I need the extra time to grope around for one of the 3 soothers hiding all around her and poke it into her mouth before she knows she woke up.  Otherwise I’ll have to feed her again.  Which isn’t so bad cause I just take her back to bed with me and drift in and out of consciousness until she starts snoring, at which time I pop the soother into her mouth that I remembered to bring with me from her bed, if I was able to find it at all, and carry her back to bed.  She goes back to sleep, and I tiptoe back to bed, always avoiding tripping over the bear head, and fall back asleep whilst retrieving my half of the blankets from the other side of the bed.

Repeat 3 more times.

Now thanks to daylight savings time, I can see the bear head for the last two treks across the floor.

What was I talking about?

Oh yeah, BREAD.

I love bread.  I used to make 4 loaves a week of lovely whole wheat bread with my very own recipe that I made up (it’s on this blog somewhere) and my Kitchen Aid.  Then my Aid up and quit and I was pregnant and didn’t want to couldn’t knead the dough.  That was two summers ago.

I found other things to eat for breakfast and let the kids eat store-bought bread once in a while, while I recovered from being pregnant and prepared to move a full day’s drive away.  I took last summer off making bread too.

Then I ran out of alternative breakfast ideas because I stopped eating dairy and eggs for baby’s sake (and mine).  Totally awesome to stop eating those when you own a cow and chickens.

So Darryl has been buying the kids the store bakery’s whole wheat bread and buying me the nice artisan sourdough, which isn’t REAL sourdough and MAY contain milk.  Ugh.  So because I’m just feeling lazy even though I get all the sleep I want, I’m trying the Artisan Bread In 5 Minutes A Day recipe, cause I can carve out that much time every day if I skip one shower a week.  I figured it all out.

Basically, you stir some salt and yeast into warm water in a big bowl, then dump in some flour, give it a stir, and let it sit, covered, for a couple hours before storing it in the fridge.  Then whenever you want bread, you pull off a chunk and let it sit on the counter while the oven warms up, then you dust it with flour and slice perfect patterns in the top with a knife and pop it in the oven for 30 minutes.

Cute.  I did it the way they suggested the first time cause that’s how I roll.  I pulled off the recommended grapefruit sized chunk, and I totally remember how big a grapefruit is cause I’ve totally bought one since I got married.  I guess I underestimated how much flour to put on my hands before handling the wet dough and fumbled with the sticky glob for a while, trying to pry it off my fingers in one piece.  That was amusing.  I should have let one of my angel kids do that and taken a picture to prove they do school sometimes.  But, like I said, I’m feeling lazy this year.

The recipe says the lump may not rise much depending on the age of the dough or something, and they were right.  It stayed grapefruit sized, more or less, until I slashed the top in a perfect pattern and slid smushed it off the cutting board and onto the baking stone in the  450 degree oven.

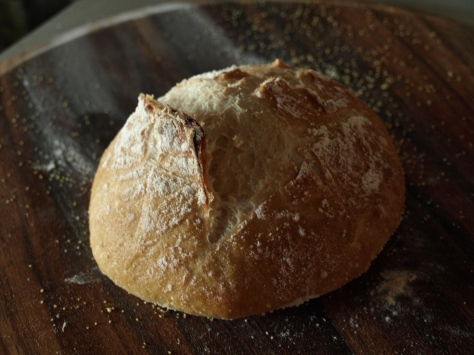
It came out perfect!

OLYMPUS DIGITAL CAMERA

The only downside was…it was only slightly larger than a grapefruit.  But it tasted AMAZING.

It didn’t make it through the day.  And I didn’t want to do that EVERY day either cause I like showers, so the next day, I doubled it.  I pulled off a lump the size of TWO grapefruit and baked that, after remembering to use WAY more cornmeal on the cutting board (it actually slid nicely onto the baking stone!), only I didn’t leave it in the oven long enough and the middle was raw.   I tried again, cooking it until it sounded hollow when thumped on the bottom, but by then, the entire crust was so chewy that everyone else in my family complained.  No one appreciates crusty bread in this house.

Soooo back to the drawing board Pinterest I went and found instructions for cooking this exact bread recipe in the crock pot.  That sounded more like it.  I used the double-grapefruit batch and the parchment paper and it cooked for about 3 hours before I risked taking it out.  The bottom was crusted, but not too bad, and the top was a light dough colour, so I browned it under the broiler.  Not quite long enough, but at least the top was soft.  Yum!  It lasted 2 days.  Perfect.  I can do that every 2 days.  Especially with NO cleanup!

So that is how I make bread now.  Except next time I’m going to put the parchment on one of those expanding steamer thingies so it’s not touching the pot, and maybe it won’t get so crusty on the bottom.  And I’ll remember to slash the top when I first put it in so it looks like artisan bread instead of a mound of pale dough.

Now watch, I’ll have to quit eating wheat for Pete’s baby’s sake and I’ll have to eat hash browns for breakfast every morning.

Can I make those in the crock pot?

Healthy Ice Cream!

I do love owning a cow.

There are so many perks.

Even on the cold, dark, evening milking shift, when she flings poop in my face with her tail or kicks the bucket over, I can trudge inside and chow down on the best fresh ANYTHING milk-related.  Take that, COW!

Just kidding.

But seriously, it makes the not-that-bad, 15 minute chore of milking seem like the best thing in the world when you have the best fresh milk, butter, sour cream, yogurt, and ICE CREAM that you can’t buy in the store, anytime you want it!

Makes me think I have it better than the most well-to-do people anywhere.  I’ll bet 99.9% of them don’t eat food this good.  I don’t even think the president gets his milk fresh from the cow or dairy products that aren’t full of chemicals his government approved of (but that’s a whole other topic).

All I’m saying is, I am blessed to have a cow.

And to eat the most amazing, HEALTHY ice cream whenever I want to!

Now, I realize most of you don’t have access to raw milk or cream, but I have to share this recipe because if you ever do get it, you will need this recipe!

No, it’s not mine.  I got it from the Paths Of Wrighteousness blog here.

But I’m going to show you how I made some yesterday.

You may recall Darryl and I bought an ice cream maker for our Christmas present.  It’s a Cuisinart 1.5 quart model.  I would have preferred one with more capacity but this one was highly recommended and on sale for less than a third the price of the bigger ones.  I think we paid about $60.

You don’t have to have an ice cream maker, but it helps a lot.  I have an older, manual, non-electric one I will sell you cheap.  Clean and works great.

So here it is.

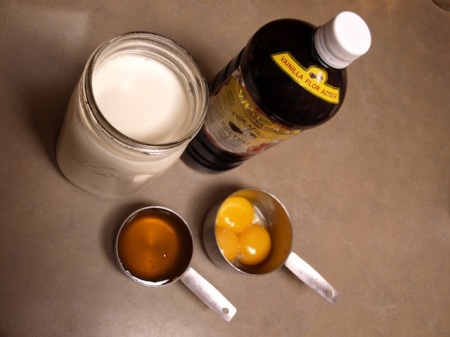
4 ingredients.  3 1/2 cups raw cream, 1/2 cup raw honey, 3 egg yolks (from pastured hens), 1 tsp vanilla.

OLYMPUS DIGITAL CAMERA

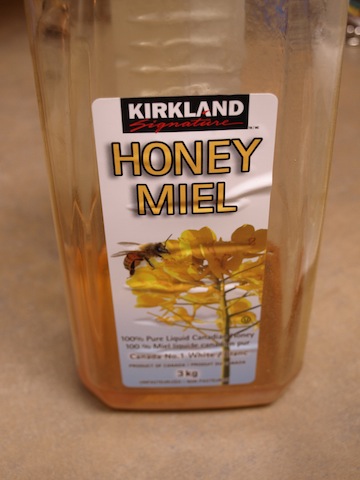
Right off the bat, I will tell you the version I made is not QUITE healthy.  I used Costco honey and I don’t think it’s the best kind.  It’s not local and I’ve read they add cheap syrups sometimes and don’t have to label it.  One day I will have bees.  Until then, we buy this cause it’s cheap.  I could buy local honey, but I put that money towards grass fed meat instead, since we can get so much better nutrition from it and eat it more often.

OLYMPUS DIGITAL CAMERA

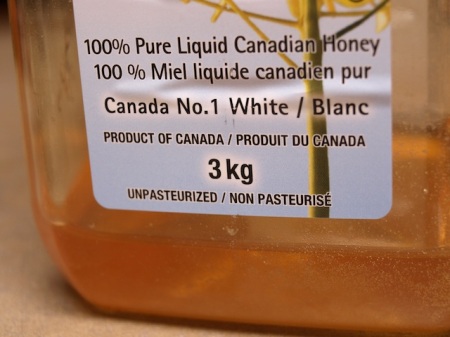
But at least it’s unpasteurized!  And from somewhere in Canada.

OLYMPUS DIGITAL CAMERA

Ok, another cardinal sin…

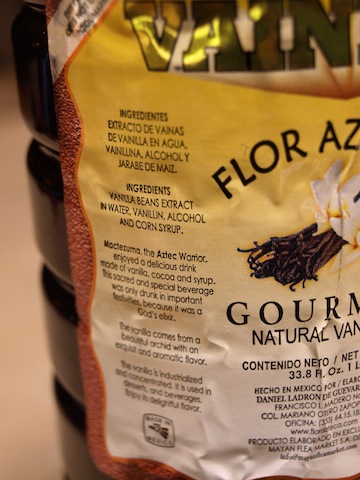
I used mexican vanilla.  It has corn syrup in it, of all things.  But I was all out of vodka so I couldn’t make another batch of vanilla and had to settle for this.  Don’t be like me.

OLYMPUS DIGITAL CAMERA

Now that that’s taken care of, we can start.

With this ice cream maker, you need to get all your ingredients ready ahead of time because the bowl is frozen and once you take it out of the freezer, it starts to thaw.  You do have time to make one (possibly 2) batches before it gets too warm though.

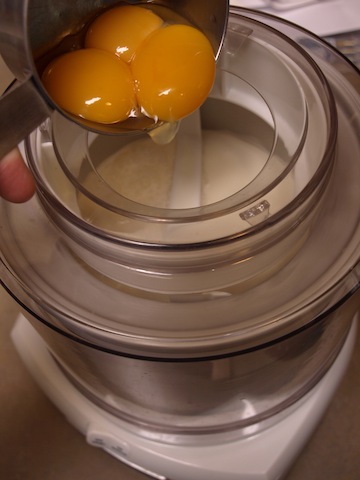
Turn it on and add all your ingredients.  After I dumped in the eggs, I realized I forgot to beat them first.  Again, don’t be like me.

OLYMPUS DIGITAL CAMERA

The honey.

OLYMPUS DIGITAL CAMERA

I did poke a spatula in there and found the egg yolks to break them up a bit.  There’s a few yellow flecks.  No biggie.

OLYMPUS DIGITAL CAMERA

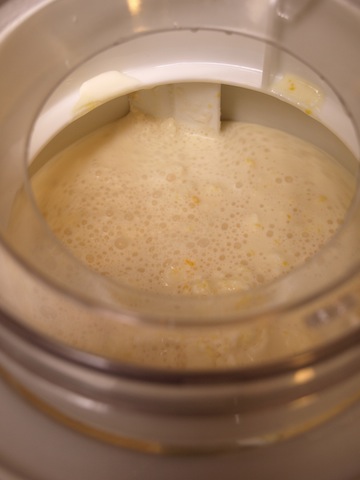
This ice cream maker turns the bowl, while the paddles and cover are stationary.  Notice the level of the ice cream inside.

OLYMPUS DIGITAL CAMERA

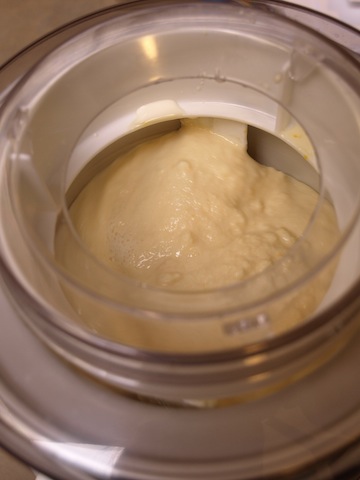
When it’s done, it fills the bowl to the top!

OLYMPUS DIGITAL CAMERA

When I was researching ice cream makers, I watched a little TV show clip about them, and they said the best ice cream was about 25% air.  I think this model makes it pretty close to that.

Then you have to scrape all the ice cream into a separate container for the freezer (or into your bowl).

It’s SUPPOSED to chill for an hour or 2, but that’s really hard to do.

I don’t know why anyone would want to.  It’s so good the way it is!

Right Chad?

OLYMPUS DIGITAL CAMERA

Yeah, I did put most of it in the freezer.  I have to stock up for a party.

This recipe isn’t like most ice cream recipes that get you to heat it up first and make a custard.  This one’s all raw.  And so easy.  And so udderly delicious I don’t think I would bother with the other recipes.

This is one I can feel good about giving to my kids!

PS. I’m guessing you could use store-bought cream for this and it would work fine, you just wouldn’t have the benefit of the enzymes and nutrients and healthy fat in raw cream.  Oh, and if you’re lactose intolerant, please stick with raw cream.

PSS. Check out my Dairy Board on Pinterest for more recipes using raw milk or cream.

PSSS. On the same blog as the ice cream recipe, in case you didn’t actually read it, there’s another recipe for healthy chocolate syrup you can use to make chocolate milk, or to pour over ice cream.  It’s delicious too.

Yummy Soup!

I made soup the other day.

Well, I make it a lot actually, but this was a new one I’ve never tried before.

It’s from the Pioneer Woman‘s website (surprise, surprise).  Everything I’ve ever made from her site is delicious.

But this soup caught my eye and I had most of the ingredients.

I used leftover turkey instead of shrimp, and Darryl couldn’t find Great Northern beans at the store so he bought white kidney beans (they’re probably the same thing anyway).

I tasted kale for the first time when I was ripping it up for this soup and it was really good!  I grew kale in my garden one year but it just didn’t look that appetizing and I never tried it!  I will plant lots this year.

The verdict?  It’s AMAZING soup.  Easy to make, and the leftovers were great too.  The kale actually stayed firm even after 3 days.  It’s on my menu for this week again, only I might use different beans and skip the meat completely (shhh, don’t tell Darryl), partly cause I can’t bring myself to buy chicken from the store anymore.  Since growing our own chickens the last couple of years, I have joined the ranks of Chicken Snobs and the thought of eating tasteless, dry chicken from factory farms is frankly repulsive.  I would buy real chicken if my budget allowed for it, but I think I’ll have to wait until we can grow some more broiler chickens in the summer.  We’re planning to raise 3 batches of 50 and have them professionally butchered (so check back here in summer if you want to buy some real chicken).

Anyway, try the soup this week.  I know you will have at least one day when you don’t have a clue what to make for dinner, so go buy whatever ingredients you don’t have so you’re ready to make it when uninspiration strikes.

Ciao.

Homemade Yogurt The Easy Whey

So I don’t know about you, but when I’m online reading my favourite blogs I keep seeing recipes for homemade yogurt using a crock pot.  I tried making yogurt one time in a cooler and it kinda didn’t work.  It came out like sour cream, which was fine cause I use it all the time.  But I also had to heat up the milk and stir it and all that and I really liked the simplicity of the crock pot method.

I had to try it.

It really was easy.  You should try it too.  Here’s the recipe.

Basically, you pour in the milk (store-bought, pasteurized is fine), cook it on low for a while, turn it off for a while, then mix in a bit of plain yogurt, then let it sit overnight.  EASY.

The first batch I made came out quite liquidy, maybe cause I used vanilla flavoured yogurt as a starter, who knows.  The second batch came out thicker, but I strained both batches cause we like it THICK.

My plan is to get a jelly bag to strain the yogurt but for now I use coffee filters.  Takes a while but it works.

All the liquid that drains out is whey.  You can use it for quite a few things and it’s very nutritious, but I’m just not quite crunchy enough to try most of them yet.  I’ve been trying to use it up though, so I substituted half the water in my bread recipe for whey, and used it for the liquid in biscuits the other day.  You don’t have to use as much whey as you would water or milk.  It makes dough runnier.  It changes the flavour ever so slightly and not in a bad way (whey…haha) at all.

Once the whey was drained out I got a full quart of thick yogurt from 1 gallon of milk.

Pasteurized milk is NOT good to drink but turning it into yogurt turns a bad product into something healthy again, and I’m all for that.

Try it.  It’s easy, yummy and cheap.

Lets Try This Again

We got a load of crabapples on the tree this year, and I was determined to make real jelly this time.

Sadie helped me pick three buckets of apples.

I washed them, cut them in half and removed the stems, just cause I felt like it.

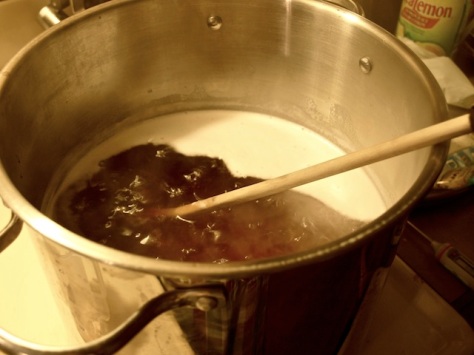
After filling the biggest stock pot I have, I added enough water to cover them and let them simmer for half the day.  Then I poured the pulp and water into a large cloth-lined bowl and tied the corners up and hung it from a cupboard handle overnight.

You don’t want to squeeze the bag of pulp or you’ll get cloudy jelly.

The next morning, measure the juice you put back into the cleaned stock pot (make sure you don’t fill the pot past the halfway mark.  It’s okay to do it in batches) and add an obscene amount of sugar.  In this case, about 7 cups for every 10 cups of juice.  I don’t think it matters a lot though, but I wanted it to work this time so I wasn’t going to risk not putting enough sugar in.  Add 1 box of pectin.

Then you have to boil it for about 45 minutes to 1 hour (at least, I did).  I read that it’s supposed to get up to 220F but it never did.  The boiling juice will overflow the pot if you’re not careful.

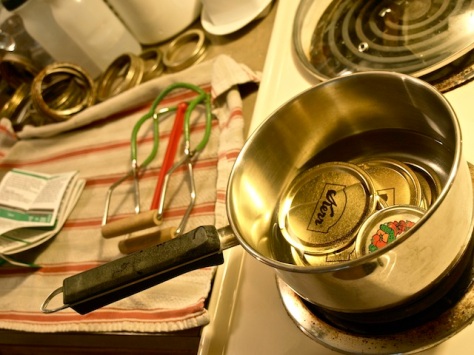
I won’t explain all the sterilized jar thing cause it’s all over the internet if you want to know.  I don’t use a water bath with these.  I put the lids on and they seal as they cool.

The result?  6.5 pints of pink deliciousness that actually set this time!  And that was only one batch.  Now I have about 18 pints socked away.

Don’t mock the rusty rings.  They worked for my mom and they work for me.

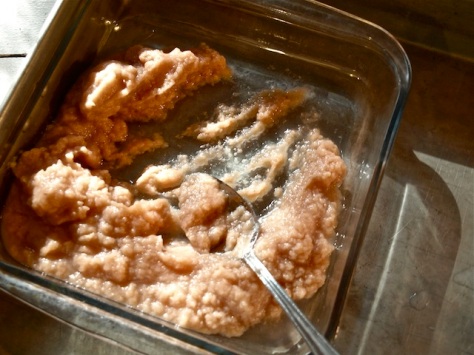
Oh, and don’t throw away the pulp!  Run it through a victorio strainer and you get pink applesauce.

THEN you give the pulp to the chickens.

Two Years Old

It’s officially Sadie’s birthday today.  She’s 2!

We had a party for her on Sunday afternoon.  For the whole week before, I was telling her what was going to happen, and every time someone asked her how old she was or if she knew it was her birthday, she said “Cake” followed by “Juice”.  I think that was her favourite part.

Her cousin Micah had his birthday party just a couple weeks earlier, so she thought we were going to Annie (Auntie) Hannah’s House for her party.  I had to tell her many times that Auntie Hannah was coming here and we were going to have a fire in our yard.  Then she’d list off more people she knew.  Micah, Ceise (Celise), Granma, Papa (Grandpa).

Yup, they’re all coming.

And a few other people too.

These were some of the weirder guests.

Here’s the obligatory Name Banner and some other details.

Celise.  She’s 1.

Chad slept through half the party in his swing.  Such an angel.

Sadie chose her outfit, and stole the hat from her little friend Faith when she arrived.  So Faith borrowed one of Sadie’s jackets.

She wasn’t sure what to think when everyone started singing Happy Birthday to her.  I wasn’t sure what she’d think about blowing out the candles, since I hadn’t prepared her in any way for that.

Lots of people I know make fancy fondant cakes that go with the theme and look amazing.  Works of art really.  I, however, don’t enjoy baking aside from bread and the occasional cake (because they taste better than store-bought) and I feel like I have enough of a creative outlet with all the gardening and landscaping and sewing and drawing (for pay) that I don’t feel a need to join the designer cakes movement.  It seems a little too tiring for me.  I sure enjoy it when other people make them though!

Last year she had Dirt Cake.  This year it was Tres Leches Cake.  That’s Spanish for Three Milks.  I made one for a mexican-inspired dinner with family last year and it was so good I had to make it again.  The recipe is on the Pioneer Woman’s Tasty Kitchen website.

Here’s my mad cake creativity…extra cake from the edges made a ‘2’ on top!  Wow!  Haha.  It’s the thought that counts, right?  And the taste!  It was yummy.

And she did blow out both candles herself!

Here’s a Birthday Tip: put the birthday boy/girl ON the table with the gifts so everyone can see and so the other kids can’t open their gifts for them.  Works great.

Thank you Hannah for taking photos with a camera you weren’t familiar with!

For those of you who asked about the rhubarb punch (and for everyone else who needs to try it!), here’s the recipe I used.  It’s the second recipe down the list.  “Rhubarb Citrus Punch”.

Now that Sadie knows what a birthday party is, I’m sure she’ll be bouncing off the walls in excitement when next year’s party rolls around.  As much as she ‘bounces off the walls’ anyway.

Thanks everyone for making her day special!

Homemade Pizza

So the other day I made some foccacia dough and added minced garlic and parmesan to it.  I cut it in three pieces…two big and one small…so I’d have two loaves and one pizza crust.  The loaves were baked that night but the pizza crust lump hung out  in the fridge for a couple days until I could get to it.

Well I got to it last night.

There were some random ingredients lurking in the fridge that needed to be used up, so they went on the crust.  Remember, this crust has garlic and parmesan mixed in.

First went some tomato sauce and a sprinkle of italian seasoning.

Then a thin slice of mediterranean chicken deli meat, broken into small pieces.

Then some leftover hamburger with taco seasoning on it.

Then some mushroom slices.

Then some diced red pepper and tomato.

Then some swiss cheese and a bit of feta.

Oh yum!  It was as good as the best take-out pizza we’ve ever had!  Maybe better!

It tasted reminiscent of a swiss mushroom burger, only much more decadent and gourmet, and without the slimy oily cheese oozing out of a nasty white-flour bun.  I think the bun ruins the taste of those burgers.

But the pizza was divine.

I didn’t get a picture, but I wanted to write it down somewhere so I can remember how to make it again.  You’ll just have to imagine how good it looks or make it yourself!  You can use any pizza crust you want, but I’d recommend making it thin.

One day I will post my foccacia bread recipe, though I think there are probably better ones out there.  This is the only one I’ve ever tried.

Now go make some pizza!


Homemade Tortillas

Okay, I have a recipe that you must try tonight, or tomorrow.

I didn’t have any tortillas and I wanted some, so I looked online for a recipe until I found one that didn’t use lard.  Not because I’m against lard, but because I had used all mine up!  This one uses oil instead.  I used grapeseed oil because that’s what we use for everything.

Here’s the scoop:

Throw 3 cups of flour into a mixing bowl.

Mix in a teaspoon of salt.

Add 1/3 cup oil and 1 cup of warm water.

Mix together until it forms a dough.  Add a little flour if it’s too sticky.

ylBxM

Now separate a chunk about the size of a kiwi and roll it out as thin as you can get it and at least 10 inches in diameter (this measurement will change depending on the size of the dough you’re rolling out and how thin you get it.  It’s not rocket science…you can have variation).

If there’s enough flour, it should lift off the counter easily with your fingers.  Throw it in a dry frying pan (please don’t use teflon) on a medium heat.

tDQyO

Now if you’re fast, you’ll have just enough time to grab another hunk of dough and start rolling it out before you have to flip the first one.  Then finish rolling it out so it’s ready to go in the pan when the first one comes out.  It takes only a couple of minutes to cook.

I found that if you flip the tortilla a second time (so it’s back on the first side), it will puff up.  I don’t know if that’s a big no-no or not, but I did a couple times to make sure some of the edges were cooked.  It didn’t seem to affect them.

hWL6U

That’s about it.  Except try not to eat too many or you won’t have enough for dinner.

You know what?  Just go ahead and double the recipe and eat as many as you like.  You’ll work up a bit of a sweat rolling them out fast enough to keep the pan occupied.

This was my very first try.  Not perfect, but it got eaten too fast to even try rolling anything up in it.

r9rFA

Now they come out much nicer.  I made chicken and bean enchiladas with one batch and burritos with another.  Sooo good!

You simply must try it!


Whole Wheat Bread

Here goes…

My first attempt at food blogging, Pioneer Woman-style.  I am going to show you how to make yummy nummy homemade whole wheat bread.  Mmmmm.

This recipe is for 4 loaves.  I missed a couple of photos but I’ll try to make it easy to follow.

These are the tools I use.  You can use whatever tools work for you.

2liy8

One of these makes a big difference too.

1TZor

If you don’t have a mixer with a dough hook, you can mix everything in a bowl and knead it by hand to get the same result.

To start, set up your mixer and pour 1 3/4 cups of HOT tap water into the bowl.  Add about 1/3 cup of honey and stir it so the honey dissolves.

64fTh

I don’t measure the honey and it always works out.

Next, sprinkle 4 teaspoons of active dry yeast over the water.

GvyLG

The yeast will sink to the bottom.  There’s no need to stir.

MK2VO

While the yeast is proofing, get another 1 3/4 cups of hot tap water.

8OEMl

You’ll need about a 1/4 cup PLUS half a 1/4 cup of butter, or 6 tablespoons.  I use salted, but it doesn’t matter.  See photo if that doesn’t make a lick of sense.

6flq1

Dump the butter into the hot water.

deWJS

While the butter thinks about itself, add 2 1/2 teaspoons of salt.

Uyvtu

And 2 teaspoons of lemon juice.

YWElo

Give it a stir if you’re impatient like me and want to get started, but the butter will melt if you give it enough time.  Stir the salt at the bottom before you pour it in the mixing bowl though.  I have to stir very carefully or it will overflow my little container.

oJfZA

Pour the butter mixture into the bowl when the yeast has bubbled up over the whole surface, like this.

eMGOS

Then it will look like this.  You don’t have to stir at this point either, but once in a while I do…but I don’t know why.

4o8Ct

While your butter is melting, go ahead and measure 5 cups of whole wheat flour into a bowl.

3jXs8

Add all of it to your yeast/butter mixture.

iaN6N

CyWgh

Turn on your mixer to the lowest setting until the flour is moistened.  You’ll want to stop the mixer once to scrape the sides down quick.

g6WlL

Here’s where I forgot a couple of photos.  While your whole wheat flour is mixing in, measure 3 cups of white flour into the now-empty flour bowl.  Grab an extra half cup because you might need it.

[Picture of 3 1/2 cups flour in bowl]

Now add the white flour one cup at a time.

[Picture of flour being dumped into mixer]

Turn up the mixer to the kneading speed.  On mine it’s number 2.  Let it go for a couple minutes, adding flour as needed.  The dough should be a bit sticky to touch, but not sticking to the bowl.  Add the extra flour if you need to.  The sides of the bowl should be fairly clean.

nr6pc

This part is tricky to explain.  Once your dough is ready, dump it out of the bowl onto the counter.  Don’t bother with more flour.  Cut it into quarters with a big, sharp knife, as equal in size as you can.  Knead each quarter to make the top smooth and roll it a bit on the counter to make a nice round ball.

kUrAO

Cover them with plastic wrap sprayed with cooking oil and let them sit until they double in size.  It takes mine about half an hour.

yKw3Y

Take a break and wash the tools you used and wipe down the mixer.

YsGHG

Now uncover your dough and knead each ball a bit to get the top smooth again and work out the bubbles.  (please disregard the nasty nail polish.  Steph got some purply glitter stuff for christmas and I put it on my thumb nail and I’ve been slowly picking it off since then)

NBLVB

Now slap it down on the counter with the smoothest side down, and fold the bottom up to the middle and stick it down hard.

yq8rg

Then fold the top down to the middle to make an oval-shaped roll.

xVFHS

Fold one end in.

JFJSL

Then the other end.  Don’t bring the ends in too far or it will be a round loaf instead of oblong.

fgS2U

Now roll the top down again and keep rolling right over until the seam is underneath.

DkvQ1

You should end up with a loaf resembling this.

j57Io

Plop them in the greased pans as you finish each one.

02Uqm

Cover with sprayed plastic wrap and let sit until they double again.  Mine take about an hour.

vhBCU

Unfortunately, I forgot to take any more pictures, but it’s pretty straight forward.  Once they look like they’re almost big enough for the oven, take off the plastic wrap and turn the oven on to 375 F.  When the oven’s hot, pop them in for 25 minutes.  Don’t forget to take them out when the timer goes off like I do sometimes.

When the bread comes out of the oven (by then, your house will smell divine), carefully turn the loaves out onto a clean dish towel and turn them right side up.  Brush the tops with butter.

When you can’t stand it anymore, cut a nice thick slice…don’t be stingy now…and pile on the butter.  Yum yum.

Now try really really really hard not to have another slice.

While they’re still a little bit warm, bag each loaf in a paper bag, then wrap it in a plastic bag, and freeze it.  It will taste just as fresh when it thaws.  It will also keep nice and soft for a week in your cupboard.

Here’s the recipe in case you want to print it out.  I did not plagiarize this recipe because it’s changed quite a bit since I started making it.  Now it’s all mine.

Utterly Divine Homemade Whole Wheat Bread

Ingredients:

1 3/4 cups hot water

1/3 cup honey

4 teaspoons active dry yeast

1 3/4 cups hot water

6 tablespoons butter

2 1/2 teaspoons salt

2 teaspoons lemon juice

5 cups whole wheat flour

3 – 3 1/2 cups flour

Method:

1. Pour 1 3/4 cups water into mixing bowl outfitted with dough hook.  Add honey and stir with spatula.  Add yeast and let sit until proofed.

2. Add 1 3/4 water to container.  Add butter, salt and lemon juice.  Let sit or stir lightly until butter is melted.

3. Pour butter mixture into mixing bowl.

4. Add whole wheat flour all at once to mixing bowl, mixing on low until combined, scraping sides once.

5. Turn mixer up to kneading speed (2 on a Kitchenaid). Add flour one cup at a time until dough is slightly sticky to touch but pulls away from the bowl.

6. Turn dough out onto counter.  Cut into quarters and roll each piece into a ball.  Cover and let rise until doubled.  About 30 minutes.

7. Punch down each piece and shape into loaf.  Place in greased loaf pan.  Cover and let rise until doubled.  About 1 hour.

8. Remove cover and set oven to 375 F.  Place pans in hot oven for 25 minutes or until tops are golden brown and loaves sound hollow when tapped.  Remove from pans.  Brush tops with butter.  Let cool.  Makes 4 loaves.